Pour pineapple juice (collected from crushed pineapple) in a measuring cup. Add coconut milk in 3 equal cups – add water if necessary.
Transfer the liquid into a large pan and bring to a gentle simmer
Stir rice, coconut milk, sweetened coconut flakes, thai red curry paste and onion powder.
Bring it to a boil then cover and reduce heat to low (dial should be a little above lowest setting).
Simmer for approximately 20 minutes or until rice is tender, stir for 15 minutes and add water if necessary.
When rice is tender, remove the pan from the heat and let it rest for 5 minutes.
When ready to serve (not before), stir in lime juice, cilantro and cashews.
Taste and season with freshly cracked salt and pepper and additional lime juice to taste if desired.
Tomato Halwa
Ingredients Quantity
Tomatoes 10-12
Sugar 2 cups
Ghee 1/2 cup
Cashewnuts 20
Raisins 2 tablespoons
Green cardamoms 6
Cloves 4
Tulsi leaves 1/4 cup
Rose petals 1/4 cup
Edible camphor (optional) 1 a pinch
Method
· Wash the tomatoes, remove the eye and make an incision on the lower side.
· Boil water and blanch the tomatoes for 2-3 minutes. Drain, peel, deseed and chop.
· Reserve the pulp with the juices. Grind the cardamom with 1 tablespoon sugar to a fine powder, sieve and keep aside.
· Heat 2 tablespoons of ghee and fry the Cashewnuts and Raisins to golden brown.
· Wash and shred the Rose petals and Tulsi leaves and reserve.
· Boil the sugar with ½-cup water and make a single-thread syrup and keep aside.
· Heat the ghee in a wide kadai (utensil), roast the cloves in it, till they start to crackle.
· Add the tomato pulp and cook till the liquid dries up. Cook on low heat.
· Increase heat and add the hot syrup slowly.
· Reduce to low heat, keep stirring to avoid burning and cook till it starts to leave the sides.
· Sprinkle the Cardamom powder, Rose petals, Tulsi leaves and the Camphor.
· Mix well
· Garnish the halwa with fried Cashewnuts and Raisins and serve warm.
Bhutte ka Kees
Ingredients Quantity
Medium sized corns 4
Ginger 2-3 (1/2 inch)
Turmeric 1 tsp.
Chilli powder 1-2 tsp.
Mustard seeds 1 tsp.
Oil 2 tsp.
Milk 1/2 cup
Water 1/2 cup
Lemon juice 2 tsp.
Sugar 1/2 tsp.
Salt to taste
A pinch of Asafoetida (Heeng)
Chopped coriander and grated coconut for garnishing
Method
Grate the corn with a hand grater to make a coarse paste. (You can also use a food processor or mixer grinder but it will affect the taste. It tastes better if you use the hand grater)
Chop the ginger and green chilli finely.
Add oil in a pan. Add asafetida (heeng) and mustard seeds till it splutter.
Add green chillies and chopped ginger.
Add corn paste, turmeric, chilli powder and salt. Stir it occasionally to make sure that no lumps are formed.
Cook it for approx.10-15 mins until the liquid in the corn paste gets dried off and the colour of the mixture changes to golden yellow.
Add milk and water. Continue stirring till its consistency becomes like halwa or upma.
Add sugar and lemon juice.
Garnish it with chopped coriander, grated coconut and serve hot.
These recipes are especially curated for us by Executive Chef Anil Dahiya, Bristol, Gurgaon
Born to a royal Jaat family where men were not commonly allowed into the kitchen, Executive Chef Anil Dahiya broke the rule and entered the culinary world with great enthusiasm. He started his hospitality journey in 1996, when he got his Diploma in Hotel Management from the Institute of Hotel Management , New Delhi. He began his career under their kitchen management scheme from the Oberoi hotels. He spent several years with the Oberoi hotels, followed by InterContinental Hotels Group (IHG), ITC and Lemon Tree Hotels. He is currently the Executive Chef of The Bristol Hotel, Gurugram.
Chef Dahiya has amassed a great deal of knowledge and developed numerous culinary skills, having worked with many renowned chefs such as Chef Vincent Joseph, Chef Michael Beechey, Chef Marshal and Chef Sadhu Rohilla.
He takes pride in creating and experimenting with new techniques and ingredients. Chef Dahiya loves to cook food in numerous ways, utilizing different unique techniques. He has appeared on various cooking shows on television such as “KUCH KITCHEN SE” on Sahara Samay on Sahara NCR.
Spider Cake
Ingredients for Cake Quantity
Unsalted Butter 110 gm
Cocoa Powder 3tbls
Chocolate Stout 140 ml
Light Brown Soft Sugar 170gm
Vanilla Extract 1tsp
Large Eggs 3
Melted and Cooled Dark Chocolate 100gm
Plain Flour 280gm
Bicarbonate of Soda 2tsp
Ingredients for White Chocolate ButtercreamQuantity
Large Egg White 3
Caster Sugar 40gm
Unsalted Butter 360gm
White Chocolate 200 gm
To purists, this is not chocolate because it is made only from the fat or butter of the cacao… melted and cooled
Ingredients to decorate Quantity
White Mini Marshmallows 100gm
Black Sugar Paste 25gm
Method
Heat oven to 180C/160C fan/gas
Grease three 20cm round cake tins and line the bases with baking parchment.
Put the cocoa in a bowl, add 280ml boiling water and whisk until dissolved.
Pour in the stout, mix then well and set aside to cool.
In a stand mixer or a large bowl using an electric hand whisk, beat together the butter, both sugars and vanilla extract until light and fluffy (about 5 mins).
Add the eggs little by little, mixing until fully incorporated before adding more. Once all the egg has been added, spoon in the melted chocolate and mix to combine.
In another bowl, mix the flour, bicarb and 1/2 tsp salt. Add this mixture to the butter mixture in three stages, alternating with the stout mixture (which will be very runny).
Pour the batter equally between the prepared tins and bake for 25-30 mins until a skewer inserted into the cake comes out clean.
Leave to cool in the tins for 10 mins, and then turn out onto a wire rack to cool completely.
To make the buttercream, put the egg whites and sugar in a heatproof bowl and set over a pan of gently simmering water.
Stir with a whisk until the sugar has dissolved and the mixture is warm to the touch. Remove the bowl from the heat and beat with an electric hand whisk on high speed until the mixture has tripled in volume and has cooled down.
Slowly add the butter 1 tbsp at a time while continuing to whisk. Once all the butter has been added, the mixture should look glossy and thick
To assemble the cake, put one of the cake layers on a cake stand and top with a layer of buttercream. Repeat with the other two layers. Spread the remaining buttercream all over the cake, using a spatula or palette knife to smooth the sides. Chill for 1 hr or until the buttercream is firm.
To Decorate
Melt the marshmallows in a heatproof bowl set over a pan of simmering water, stirring from time to time.
Remove from the heat and put to one side for a few mins until the mixture is cool enough to handle.
Use your fingers to grab a small amount of the marshmallow and stretch it out to form long strands (dipping your fingers in vegetable or sunflower oil will help!)
Drape the strands over the cake in a random pattern, so it’s thoroughly covered.
Create a spider using the sugar paste (roll two balls, one bigger than the other, for the body, and thin strands for the legs) and place on top of the cake.
Mummy Dogs
Ingredients for Cake Quantity
Breadstick Dough Package refrigerated 11 Ounce
Hot Dogs 8
Mustard
Poppy Seed
Ingredients for Breadstick Dough Quantity
Warm Water 1cup
Brown Sugar 3tbsp
Salt 1tbsp
Oil 1⁄4cup
Bread Flour 3 cups
Yeast 2 1⁄2tbsp
Method
Make dough using your favorite method- bread machine, mixer or by hand
Preheat oven to 375°F Using 1 dough strip for each, wrap hot dogs to look like mummies, leaving an opening for eyes.
Place on ungreased baking sheet.
Bake 12 to 15 minutes or until light golden brown.
Place dots of mustard and poppy seeds for eyes and enjoy!
Mix Eggs, Flour and salt. Knead Well. About 3 mins should be ok. Keep it for 30 mins.
Making the Filling
Preheat the oven to 375°F (190°C). Lightly oil a baking sheet. Peel and Cut the Pumpkin and scoop out the seeds and cut into small dices Bake the squash for 45 mins along with garlic or until well cooked
Place it in a bowl, mesh it well, stir in the cheese and grate the nutmeg and some crushed pepper corns and mix well.
Making the Pasta
Roll out the pasta dough very thin so as to literally see the yellowish filling inside
Cut the pasta sheet into 2 ½ inch squares.
Place 1 spoon of filling and stick the parallel ends together to form a triangle and then stick the other ends together for form the Cappellacci.
In boiling water, cook Cappellacci for 3-4 mins approximately or Until firm or as they say “Al Dente”
Melt the butter in a pan and add sage leaves
Transfer Cappellacci to the pan, add few spoons of stock if needed.
Check on the seasoning.
Top up with some Parmesan Cheese. Serve Hot.
RISOTTO ALLA ZUCCA Italian Creamy Rice
Serves 5 portions
500 grams Arborio Rice
300 grams Roasted Butter Nut Pumpkin
120 grams Butter
100 grams Parmigiano Reggiano Cheese
2 grams rosemary leaves
2 cloves of Garlic
3 table spoon chopped Onion
1.25 ltr Stock
Salt
Pepper
Method
To the pan add butter, garlic and onions. Sauté till transparent
Add roasted Butternut Pumpkin and Arborio Rice
While stirring, keep adding stock in the batches of 250 ml each
Once half done add rosemary leaves
After adding all the stock OR nearing Rice being soft add Parmesan Cheese
Here we bring to you not one but two amazing recipes by Chef Guillaume Lejeune, Director of Pastry Studies, Academy of Pastry Arts, to make your weekend an amazing one. So now you know what you have to cook for the weekend.. here is goes
Financier (Almond based travel cake)
Ingredients
Quantity (Gr)
Butter
150
Egg whites
150
Icing sugar
165
Almond powder
85
Flour
50
Chocolate chip
50
Procedure:
Cook the butter until golden color and nutty in flavour
On the side, combine flour, almond powder and icing sugar
Mix egg whites into the dry mixture
Gently add in melted butter. Make sure the butter temperature does not cook the egg whites
Add chocolate chips last and refrigerate
Bake at 170°C in a silicon rectangular mat for 10mins.
Aloo Foccaccia (Indian Twist for my Indian Readers)
Flour
500
Salt
10
Yeast
12
Mashed potatoes
275
Water
280
Olive Oil
50
For the topping:
Coriander leaves- 30gm
Sliced onions- 50gm
Green chilli chopped- 3-4 no.s
Garlic chopped- 20gm
Procedure:
Mix all ingredients together and make smooth dough
Grease tray and hands with olive oil before handling dough.
Proof for an hour, punch and shape dough in baking tray
It’s summer, and for a lot of us, summer and barbeque cookouts go hand in hand. If you’re planning lots of outdoor dining experiences this season, why not aim to make your cookouts the best yet?
There are lots of simple cookout tips that can elevate your barbeque from ok to AH-MAZING and make the whole process of barbecuing even easier. If you use even just a few of them, you’ll soon get a reputation as the best barbeque in the neighborhood.
Put the Doritos to Good Use
There’s nothing worse than planning to cook burgers on the Barbie, only to find out that you’ve run out of kindling and you’re all going to go hungry after all. But, if you have some Doritos in the kitchen or any chips for that matter, you will be able to go ahead and flame-grill those burgers because, chips, and especially Doritos, make for excellent barbeque kindling, due to their dryness and their high-fat content.
Coat Your Hands
If you love making burgers, and you know that your homemade patties are the best, but you hate having bits of meat stuck to your hands, simply coat them with either a small amount of cold water, or even better a thin layer of vegetable oil, and you’ll bed able to make enough patties to feeds the whole neighbourhood before your hands become a sticky mess in need of a good wash.
Keep Your Meat Moist
If you want your guests to be amazed when they bite into you burgers because of your patties are so succulent and juicy that they basically melt in the mouth, then you really do need to work at keeping the meat moist. This isn’t always easy when you’re outdoors in the heat. Fortunately, the fix is a simple one – just mix a couple of tablespoons of mayo to each pound of ground meat you use will ensure a moist burger and enhance the flavor.
If you’re cooking your meat medium rare and you want it to be perfectly pink in the middle, you could also add an ice chip in butter to the center of the burger, and that will stop it from getting too hot.
Two Temperatures
One of the best tips I was ever given was to heat the barbeque to two different temperatures, one at each side you can do this by only heating up half of the grill. That way, you can move cooked foods to the cool side to finish off without the risk of them burning.
Make Use of Muffin Trays
Barbeques are nothing without condiments, but what do you do when you don’t have enough condiment dishes to meet your needs? Do you just serve your ketchup and mustards in the bottle? No, you don’t. You serve them up in muffin trays, that’s what you do!
If you’re cooking kebabs (and if you aren’t, why not?) Instead of attaching your meats, seafoods and vegetables onto one kebab skewer, use two instead. It stops individual chunks from moving around and getting burnt or unevenly cooked as a result. Just remember to soak your skewers before use if they’re wooden, to avoid setting your lovely food on fire.
Flavor Your Meat with Wood
No, I’m not telling you to add wood chips to your ground beef! But, using wood will add bags of flavor to your burgers and make them stand out from the competition. What you need to do is use planks of wood on the grill instead of metal. They will keep the food safely away from the flames and add a woody, smoky flavor to the food. Different woods have different flavors, so you might want to experiment a bit before you throw a cookout for the whole block, but most people find cherry wood to be very pleasant. If you’re interested, you can buy wooden planks for barbecuing at http://www.outdoorgourmet.com/plank-grilling-cooking/wholesale-grilling-planks.These planks are reusable, so they’ll help you to perfectly flavor your barbeque food for the whole summer and perhaps for many summers beyond
Season with a Salt Block
I’m going to say three words that will change your life – well the barbecuing aspect of it anyway – forever: Himalayan salt block. If you don’t know what Himalayan salt is it’s that pink salt that you often see in whole food stores. Bought in a block, it is hands down one of the best things to cook barbeque food over. Skip, the usual seasoning and just lay your meat down on a salt block over an outdoor stove (gas or electric) and you will be rewarded with the tenders, juiciest most flavorful meat you’ve ever eaten in your life guaranteed.
Lots of Lemons
If you’re having a barbeque, then you most certainly should not forget to pick up some fresh starts at www.Citarella.com/shop/lobsters-shrimp, and when you have that wonderfully fresh seafood delivered to your door, you simply must cook it over lemons. Just slice up a few of the citrus fruits and put them on top of your fish, lobster and shrimps it cooks for an end product that manages to be sweet, smoky and slightly sour all at once. Your guests will be shunning the burgers for the shrimp if you do.
Alternatively, you can make a simple marinade by combining olive oil, lemon juice, and garlic and marinating your seafood in that for a few minutes before cooking.
Spray Some Apple Juice
Apple juice isn’t just for drinking. In fact, it is perfect for barbecuing. If you spray your grill with apple juice every so often, and you do the same to your meat too, it will be browner, more tender and all round more appetizing. It sounds a bit odd, but trust me it works really well.
Brick Your Chick
We all love to eat chicken especially when it has been chargrilled to perfection, but actually cooking chicken on the barbeque can be quite difficult because of its irregular shape. Chicken is rarely the same uniform thickness, and this means that when one part is cooked, the rest might not be or it could be. A very simple hack to solve this problem involves nothing more than a brick and a sheet of aluminum foil. Wrap the brick in foil and use it to press down the chicken until it is one completely even. Then, leave the brick on top of the chicken as you cook it. The meat will be more crispy and tender than any of yore previous efforts.
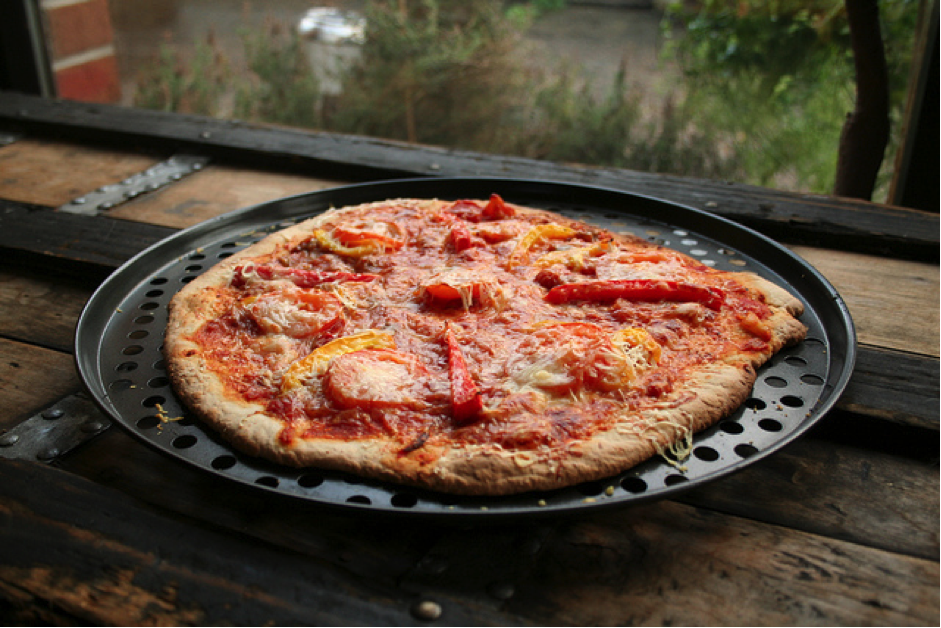
Most people don’t expect to be served up freshly cooked pizza at the cookout. Sure, they might expect to see some pre-cut slices of cold pizza, but fresh, molten hot pizza – that’s something you don’t often see at a barbeque. So, why not exceed your guests’ expectations by serving them up a freshly grilled pizza? It’s really easy to do. Just check out http://ourbestbites.com/2009/06/tutorial-bbq-grilled-pizza/ for instructions. You can thank me for the tip later!
Make Veggie Parcels
Of course, not all of your guests are going to be meat eaters, and even if they are, it’s always good to serve up some veggies to healthy things up a bit, but what to cook? Vegetable parcels, that’s what. They’re so easy that they’ll take up very little of your time and because they’re cooked in foil, there’s no risk of them being contaminated by meat and fish juices.
To create delicious veggie parcels, just chop up and combine mushrooms, peppers, zucchini, corn on the cob, garlic, and sweet potato. Suasion with herbs and salt and toss on the barbeque for between five and ten minutes.
Serve Up Smoked Salt
While you’re grilling up burgers, fish kebabs and sausages on the barbeque, why not use that time to create your own smoked salt too? It tastes amazing, and you can use it to add that smoky barbequed flavor to dishes that have never been anywhere near the grill. All you have to do is light the grill, fill a pan with your favorite salt, and any other herbs you fancy and place the pan directly on the grill. It’s a good idea to use a nice smoky wood like cherry or apple to give the salt the most flavor, but you can use anything you like to get the desired flavor and ensure that you always have a smoky condiment on hand when you have a hankering for barbeque and no time to grill.
Soak Don’t Scrub
The worst thing about hosting a cookout is the clean up that comes afterwards. Luckily, I have the answer to that problem – don’t do it. If you use paper plates and disposable cups, knives, and forks, and you soak your grill in a solution of ammonia once it’s cooled, you’ll hardly have to clean anything up at all, and you can well and truly enjoy your summer evenings!
Are you a grilling or queen? What are your top tips for hosting the best cookout and producing the best barbeque food in the the neighborhood?
In our quest to find the perfect dessert, we always come up with the one thing we know we should avoid, sugar. Sugar turns into fat, which turns into extra digits on the weighing scale. And, yes that tasty cheesecake is sheer heaven on a plate, but all the sugar and carbs will weigh heavy on you in so many ways. The answer? The fat bomb!
Now, the name might not sound like a weight-loss miracle, but they’ve been used as part of the very popular ketogenic diet, where you have no carbs but fill up on fat for weight loss, and the results have been shown to work. If you check out the Bulletproof Diet or the LCHF pages, there are plenty of sources out there that swear by it, not to mention the fact that various types of natural fat are now been shown to very good for you. The great thing about these fat bombs is that they are only a few ingredients and require no baking. Now, there are some great no bake desserts and no bake recipes out there, and these fat bombs are sort of taking the inspiration from them, but have gone low sugar and low carb. So, to get you started, here are a couple of simple and sumptuous fat bombs.
A filling, tasty and healthy alternative to the ones you buy in the store, these are high in good fats, have a big dollop of protein and provide some key minerals.
Serves: 32
Ingredients:
1 cup of melted coconut oil
1 cup of organic peanut butter (no added sugar or palm oil)
Chocolate and sea salt has converted many people to its wonderful taste, but here’s a low sugar version which is just as good as the sweet treats in the store.
Ingredients:
½ cup of heavy whipping cream
½ cup of coconut oil
½ cup of sunflower butter
1/3 cup of cream cheese
1 teaspoon of vanilla
2 tablespoons of cocoa powder
1 teaspoon of cinnamon
3 tablespoons of grass fed butter
2 tablespoons of sea salt
Instructions:
Whip the cream until they form soft peaks, add the vanilla and fold in.
Place the sunflower butter, butter, cinnamon, cream cheese, coconut oil and the cocoa powder into a food processor and blend until smooth.
Fold the mixture into the whipped cream until it is all combined.
Pipe the mixture into silicone molds, sprinkle with the salt and store in the freezer for 6 to 8 hours.
After a month long sacred month of Ramzan, its time to break the fast, and Eid-Ul-Fitar marks breaking of this fast. On this occasion, FunFoods by Dr. Oetker recommends tasty desserts which are mouthwatering, easy to make, and would allow you to enjoy the festival as well with your loved ones. And whats an Eid without Seviyaan. So here are not one but two drool worthy recipes, shared especially for you!
Shahi Lucknowi Seviyaan Recipe by Chef Ranveer Brar, Creative Kitchen, Dr. Oetker FunFoods
Servings: 2
Ingredients:
500 ml Full Cream Milk
50 g Almonds, chopped
50 g Cashewnuts, chopped
60 g Roasted Vermicelli
1 tbsp Condensed Milk
1 tbsp Sugar
50 g (3 tbsp) Dr. Oetker FunFoods Milk Shake Mix Kesar Pista
½ tsp Kewra Water
1 tbsp Pistachio, chopped
Directions:
Heat saucepan (low flame) add milk, almonds, cashewnuts and vermicelli. Let it cook for 5 minutes or until milk starts to boil.
Add condensed milk, sugar and milk shake mix. Cook for 5 minutes or until Milk shake mix is dissolved completely and mixture is thick in consistency.
Pour kewra water and mix well. Garnish with pistachio and serve.
Level: Beginner
Preparation Time: 5 Minutes
Cooking Time: 10 Minutes
Gulab Kheer Recipe by Chef Ranveer Brar, Creative Kitchen, Dr. Oetker FunFoods
Servings: 4
Ingredients:
1 Litre, Full Cream Milk
100 g Rice, washed and soaked for 30 minutes
100 g Sugar
1 tsp Green Cardamon Powder
8-10 nos. Cashewnuts, chopped
60 g (4 tbsp) Dr. Oetker FunFoods Milk Shake Mix Rose
5 nos. Almonds, chopped
Directions:
Bring milk to boil in a large saucepan.
Add rice, sugar, cardamom powder, cashewnuts and rose milk shake mix. Simmer over low heat until the mixture thickens and the rice is cooked completely.
Pour the mixture into serving bowls. Refrigerate it for 2 hours, garnish it with almonds and serve.
Pankaj Bhadouria, has been a household name ever since she won the title of first Master Chef India, and there has been no looking back for her. Her constant growth in terms of her cooking skills and her overall persona has been an inspiration to many women who used to think that cooking is only a duty and not a passion that can turn your life around. But Pankaj has proved her mettle over and over again, and more recently by launching her 5th book, she not only proves her capabilities as a chef but also tries touching a million chords by giving her readers exactly what they need.
Food is synonymous to breath for her and spices are the essence of it. Her journey of teaching kids in a classroom to teaching young chefs and cooks the art of making food is one of its kind. Right after winning the competition she has come to the world imparting her culinary skills to the world through the form of shows or books.
The right blend of spices is crucial to Indian cooking and it’s the combination of different spices that make some dishes so hard to resist. India’s First MasterChef Pankaj Bhadouria has identified around 50 such spice mixes with a tantalizing recipe following each spice mix which can be made at home. With 4 books to be acclaimed for, Pankaj’s 5th book, The Secrets in the Spice Mix, helps you make these wonderful spices at the comfort of your home and infuse some authentic flavours to your everyday cooking.
Chosen Piali, The Curry Bistro, as the venue for launch of her book, Panjak went on to conduct a live cooking session as well.
Piali’s menu is one of its kind and what makes it different is the class of curry and the spices that go into making them what they are! One such dish on the menu is the Thai Curry. Pankaj not only shared her secret spices and signed the books for her followers but also demonstrated the cooking of the Thai curry live for the present audience.
“I am really excited to be launching my secrets at Piali and the following live cooking session. I am happy to be able to share them with my audiences and where better than a place which savors the spices the most!” said an eager Pankaj.
Upon being asked what her favourite cuisine and dish was, she said it without any apprehensions that her favourite cuisine for sure is Indian, and she loves home cooked Khichdi, for the simplicity of the dish. Here is a glimpse of the event coverage right from the Piali’s Facebook Page.
She is such a down to earth person, that meeting her overtime, leaves me inspired totally. She fills me with so much of gratitude and warmth. I wish Pankaj all the success for her book, and stay tuned, will be sharing the book review and a recipe from it soon as I am currently reading my personally signed copy of the book, and in my kitchen trying the recipes.